
I was lucky enough to be invited into the home of Zibby Owens to make some winter themed treats. Zibby is the creator of a fabulous podcast Moms don’t have time to read books (isn’t that the truth!) Recently, she started making some videos along with her husband Kyle, of Morning Moon Productions (look out for some fabulous work from him too!)
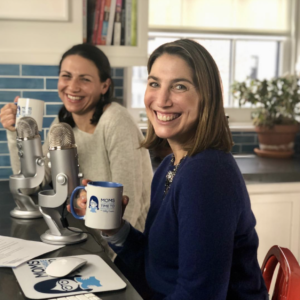
On our VIDEO, Zibby featured my two books, The Confetti Cakes Cookbook and Confetti Cakes for Kids, and I taught her how to make a perfect swirl.

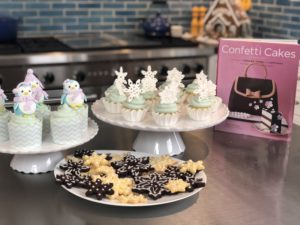

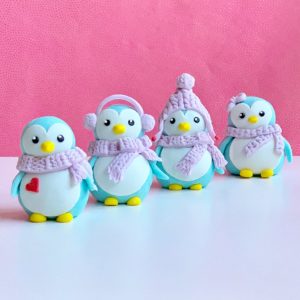
In addition, I brought her some delicious snowflake-shaped cookies and adorable Penguin cupcake toppers, all using recipes from my books. Although I do show how to sculpt a number of cute little creatures in my books…
I thought I should list here how to make these cute little Penguins!

What You Need:
Materials:
- White fondant (with food coloring gels) or buy pre-dyed fondant(I used Satin Ice vanilla in White, Black, Baby Blue, Lavender and Yellow)
- Optional: Red for heart
- Shortening (for rolling out fondant)
- Gum glue or water
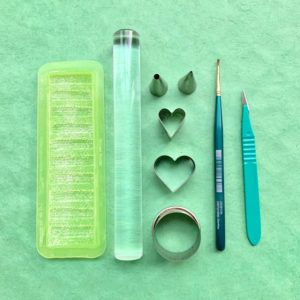
Equipment:
- Toothpicks
- Plastic Mat
- Small rolling pin
- Paring knife
- small paintbrush
- 1″ heart cutter
- 1.5″ heart cutter
- 1.5″ round cutter
- #8, #2 pastry tip (for the eyes)
- Optional: Knit mold (for the scarf)
For the HEAD:
For the Head, Body, Flippers and Feet:
Plus the Scarf and the Face and Heart:
Method:
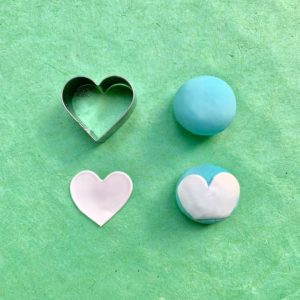
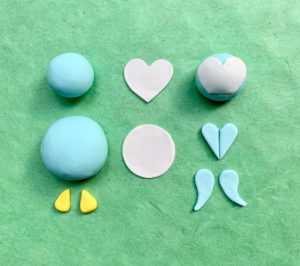
- Use approximately 1 ounce of blue fondant. Make two balls for each penguin. The balls should be about 1.5″ for the head and 1.75″ for the body (there is a lot of wiggle room here depending on how you want your penguin to look 🙂 If you have time let them sit overnight to become firm. Using a small amount of the same fondant roll out to 1/8 inch thick and cut out with the 1″ heart cutter. Cut the heart in half and shape into two arm flippers and attach the next day when assembled.
- I find it is easiest to “build” the penguins on a toothpick. Set a toothpick into the top of a box or plastic container so it is easy to assemble to penguin. Stick the two balls together with some water onto the toothpick.
- Roll out the white fondant to approximately 1/16 inch thick. Cut out a circle using the 1.5″ round cutter and a heart using the 1.5″ heart cutter. Glue the heart to the head and the round to the belly. While the white is rolled out cut out two tiny circles using the point of the #2 Pastry tip.
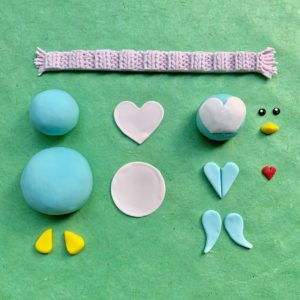
- Roll out the black fondant to approximately 1/8 inch thick. Use the point of a #8 pastry tip and cut out two eyes. Attach the eyes to the head and then attach the white tiny circles to create a highlight in the eye. (only use a tiny bit of water or gum glue or else the eyes will slide!)
- For the nose and feet, form with yellow fondant. The nose is about 1/4 inch long and the feet are about 1/2 inch long. Attach the feet UNDER the bottom and attach the nose between the eyes (be careful not to go too low!)
- To make the scarf, roll out a small piece of the lavender fondant, approximately 6 inches long and 1/4 inch wide. Either place in a knit mold or use a tool or back of the scalpel to create a pattern on the scarf and fringe at the two ends. Gently pick up the scarf and wrap it around the neck of the penguin. Apply a dab of water to stick the scarf together where it meets.
- Now make the Penguins your own, add initials, symbols, headphones, hats, earmuffs, a bow etc. As my daughters would say…accessorize!
And just like Zibby (who has four gorgeous children)…I come back from work and I’m reminded just why I don’t have more time to do stuff (like read books!), and for now that is fine with me 🙂

- And for more tips, tricks, videos and tutorials check out the CAKE TOOLS page on my website!